EDITING KEYS
There are two ways to do this. One is under the
motion tab, the other is the Time Track
KEY INFO
Under the Motion tab (the unicycle) when you
have the biped selected, you will see the 'Key Info' bar. Click it to extend the
rollout:
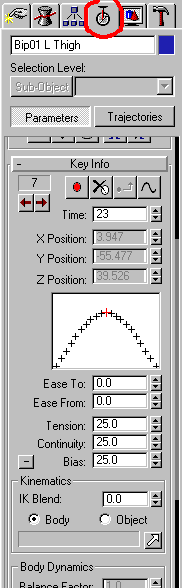
This provides key information about the selected bone relevant to
the current frame (denoted by the slider bar). If there is no key for this bone
on this particular frame, then the red-spot button will be active. This button
creates a key for the selected bone at this frame, recording it's current
position and rotation.

Should you wish to delete the selected bone's key from this frame, then the
delete button is the one next to the 'create key' button with the white spot and
black cross though it.

Should you wish to jump immediately from key to key (for the selected bone) then
you can use the back and forth arrows. The key number is listed above them:
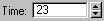
 The current frame
is shown below the create/delete buttons:
The current frame
is shown below the create/delete buttons:
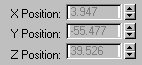
And if it is relevant to the bone, you may adjust the XYZ position of the
selected bone using the manual input sliders below the time box:
Finally, the animation easer controls are to be found here...
Easers control the dynamics of an animation's movement. The dictate how rapidly
an object or it's movement accelerate from it's starting point, whether it slows
or speeds up in the middle and how it comes to a stop, suddenly, or dampened?
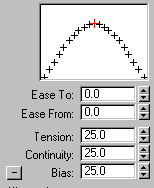
Playing these controls will yield different results. On the whole, I fond that I
do not need to alter them but occasionally I need to put the continuity and
tension down to zero for a steady, mechanical movement. I suggest that you maybe
have a play with these controls to see what effects you can create.
TIME TRACK
The other way of editing the key info on objects is the Time Track. As with most
things in MAX, there are numerous wonderful things you can do with the time
track, and to be honest, I could be sat here all week writing pages on it. I
can't do that unfortunately, so I will simply explain how to adjust and edit the
keys using the default track. You can open the Time track either buy selecting
'Track View'/'Open Track View' from the menus or by clicking the Track View
button:

You will be rewarded with the following window for your efforts:
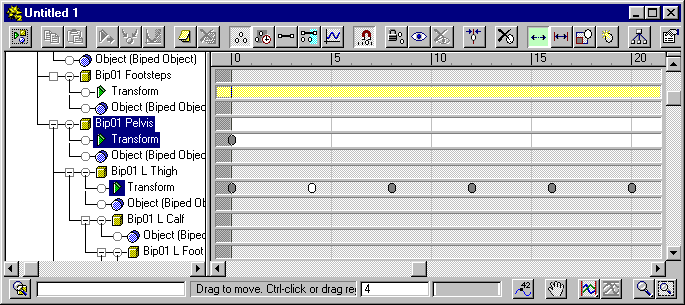
The Track view is laid out like this: To the left is the list of all objects in
your scene, stacked, tree-like in order of their hierarchy. i.e.: parents are
listed down the left hand side and children step down and right, branching off
each parent object.
To the right is each object's animation data laid out as a table. Each object
has a bar that relates, not only to itself but also it's properties. The bar is
divided into segments by the ruler on the top. This denotes each frame in the
animation sequence. You will note that the center area is light grey. This is
the active time segment. The dark grey areas either side are outside the active
time segment. It is possible to place keys outside of the active time segment
but they will not be seen in the animation (though they will affect it inside
the active time area).
When you initially open the Time Track, you will see a short list like this:
Any object with a plus sign next to it has branches emanating from it. Simply
click on the plus sign to expand them.
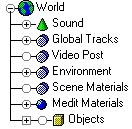
If you right-click on the word 'Objects' at the bottom and select 'Expand
Objects', you will see a complete list of all objects in your scene unfold down
the screen.
IF you select 'Expand All' you will see absolutely every track expand down the
left hand side. This gets quite messy so What you can do is set the track view
to only show the object that you select. Click the 'Filters' button in the top
left of the Track View.

You will see this options window:
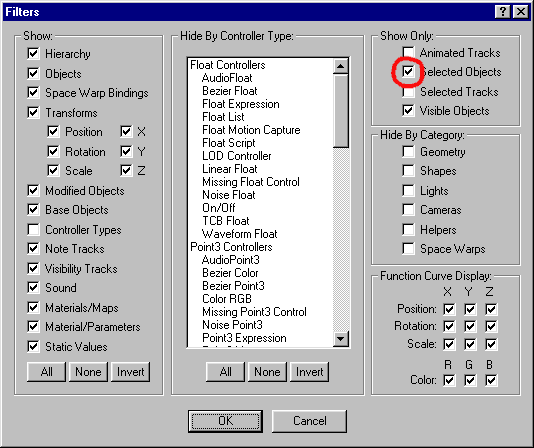
Make sure that you check 'Selected Objects' as I have done here, and now only
the branch with the bone you have selected will appear in the Time Track. Handy,
no?
Over on the right hand side, you will notice the grey and white spots in the
tracks. These are the keys. That's what they look like. Not much. White spots
are selected, grey spots are not.
Each key spot is positioned on the track at a certain frame to denote that that
bone or object has a key at that point in time. It is possible to drag keys
along the track. The closer to each other you place keys, the faster the
animation becomes. Similarly the further apart the keys are, the slower it
becomes.
It is possible to copy keys, by holding down the shift key and dragging a key or
group of keys selected by first dragging a box around them.
Now, to edit a key, simply right-click on it and you will be presented by an
editing box similar to the Key Info box under the Motion tab (see above).
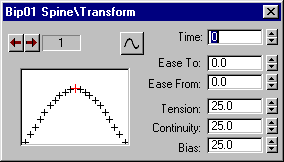
The options work the same as the controls under the Key Info bar under the
Motion tab.
To delete keys, either select them and press the delete key on your keyboard, or
click the delete button on the Time Track's top bar:

To create a new key on a track, click the create button:

...and click anywhere in the transform bar of the object/bone to create the key.
This only works in relevant bars such as the position, rotation or scale bar
under the transform branch of the object's properties. In the same way as
clicking the little red spot button in the Key info area (motion tab - see above),
the new key adopts the position, rotation and scale info currently relevant to
the object at that point in time.
Okay, this is a bewildering array of information to take in at once and I have
really barely scratched the surface of the Time track and Studio MAX animation
in general, but I honestly think the only really important things you need for
Half Life animating is the ability to add/delete and move keys and the ability
to adjust the easers. Everything else, I think is essentially superfluous.
LOCKING
Something I find particularly useful is Locking the
feet when positioning a figure. I find that Bipeds can suffer somewhat from
slipping feet even though you try to keep them still. It is possible to lock the
hands and feet so that they do not move no matter what you do. This will not do
as a solution alone. In order to get them to stay there when they are unlocked,
you need to create keys at every frame you wish them to be locked. The way that
you lock them is this:
With any part of the Biped selected, go over to the motion tab and you will see
the Key Framing rollout:
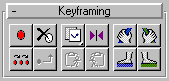
You will notice the hands and feet symbols to the right. Each button corresponds
with a hand or foot on the biped. Green = green, blue = blue. You get the idea.
If you activate a button the relevant hand or foot will lock and not move under
almost any circumstances until it is unlocked. The downside is this is just a
working tool. It locks the relevant hand or foot across the animation and does
not carry over to the SMDs when exported. So, what I usually use it for is I
decide when a foot is supposed to be planted on the floor and I lock the foot,
and go through each frame one at a time (usually only three or four) and set
keys. Then I unlock the foot and it plays back fixed.
BIP FILES
One simple cheat you can use to block in animations
is to use a BIP file. These are files native to character studio which record
animation in the biped. They are used primarily for motion capture but you can
create your own.
So what you can do is open the existing Valve Bipeds from the SDK and record the
animation and then load it into your modified Biped. This will require some
severe tailoring, but it breaks the back of the work for you.
Open a Valve Biped, say, maybe the swimming animation. Select any bone in the
biped. Go to the motion rollout (Unicycle). Under the 'General' bar is a series
of controls. Click the 'save as...' button (the big floppy disk button). This
will give you the option to save the animation as a BIP file. Save it as
something relevant, for example, if you opened the swim animation call it 'Valve_Swim'
or something.
NOTE: If it gives you the option to save a FIG file, then you are in figure
mode, and you need to deactivate the Figure mode button.
Now, open your unanimated, base biped and load the BIP file. You select any bone
in the biped and then go to the 'General' bar again under the Motion rollout.
This time, click the 'Open' button, the one with the yellow folder. Find the BIP
file you just saved and load it. Your biped should be now animated, but somewhat
poorly. The feet will be in the wrong place and the limbs will clash, it depends
on how much you have distorted the biped from human. You can find the various
key frames and adjust the biped and correct it.
That's it. That's about all I can teach you for now. As I said in the
introduction, I will probably update this tutorial as I learn new stuff and
learn the existing stuff better. I might even add to the existing stuff, because
I've barely scratched the surface on a lot of it. It's up to you now to
experiment, practice and just simply have fun.
Tutorial created by Scarecrow,
THANK YOU !!!
©
http://www.Planetfortress.com/TF2Models
TF2 is trademark of Valve
Software and of Sierra Online.
© 2000 TF2 MODELS - Hosted by Planetfortress
Web designer/Webmaster : IXNAY